 Blaine
 Fiber Cement Siding Service Built for Custer's Weather
Custer sits inland from Blaine's waterfront but still close enough to Drayton Harbor and the Strait of Georgia that salt-laden air, driving rain, and a long moss season are part of normal exterior wear here, not the exception. This page is about one specific job: installing James Hardie fiber cement siding correctly on a Custer home. Not why fiber cement beats vinyl or engineered wood in general, not the full case for why we standardized on one manufacturer — just what a Custer homeowner actually needs to know about getting this specific product installed right on this specific piece of Whatcom County.
We install James Hardie fiber cement siding exclusively. That means every crew we send to a Custer property has done this exact installation many times, on homes dealing with the exact combination of moisture and salt exposure that this part of the county sees. That focus is the whole point of this page.
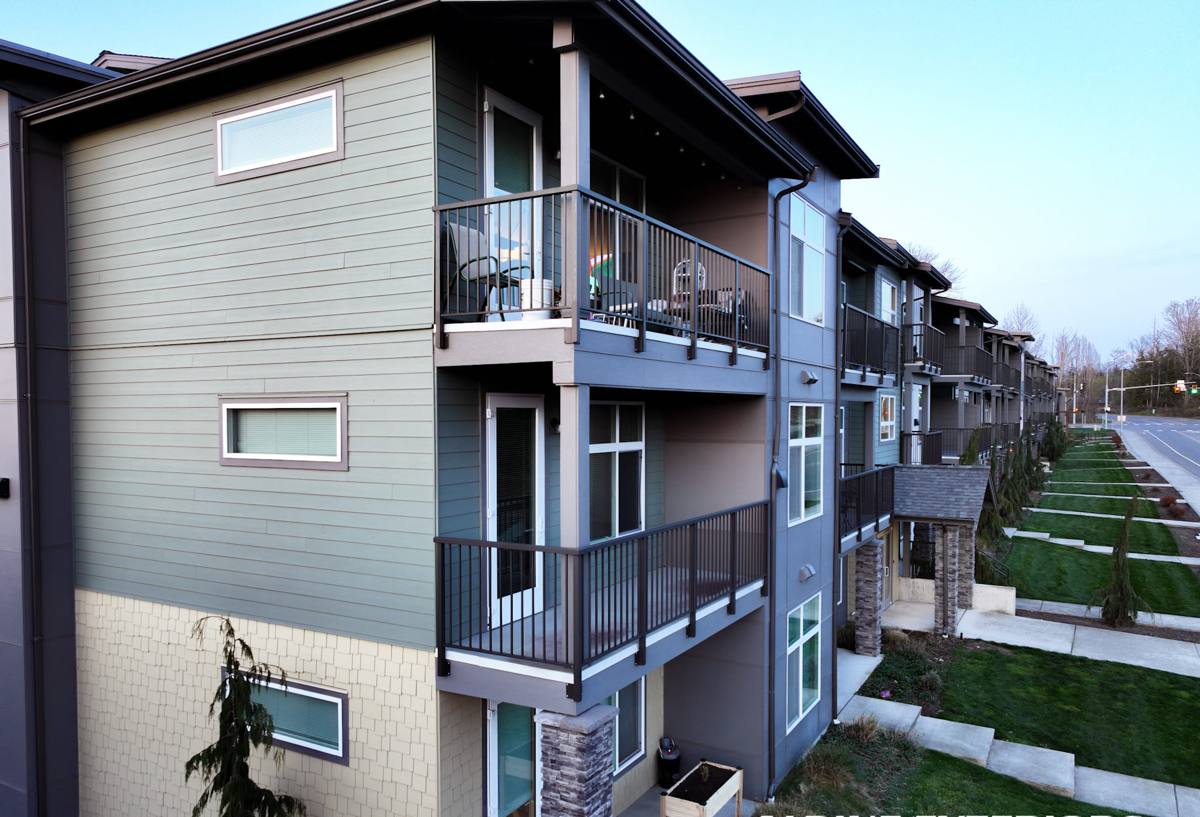
What Custer's Climate Asks of a Siding Job
Three conditions do most of the work wearing down exterior siding around Custer: salt-laden air moving in off the water, rain that gets pushed sideways by wind instead of falling straight down, and a moss and mildew season that runs across most of the calendar because temperatures rarely get cold or dry enough to shut it off. None of those three is unusual for Whatcom County. What matters for an installation crew is that all three show up together, year after year, on the same wall assembly.
That combination changes what "correct installation" means in practice. A siding job that would hold up fine in a drier, more sheltered market can still fail here within a few years if the water management details are wrong, even though the material itself is rated for the climate. Fiber cement handles the moisture and salt exposure well on its own, but the installation is what determines whether that resistance actually gets used or gets undermined by a bad joint, a missing flashing detail, or a fastener driven wrong.
James Hardie Product Lines We Install
James Hardie makes several distinct product lines, and part of our job during the estimate is matching the right one to the house, not defaulting to whatever's easiest to install. Here's what we typically work with on Custer homes.
| Product Line | Typical Use | Look |
|---|---|---|
| HardiePlank lap siding | Most common choice for full re-sides and additions | Traditional horizontal lap, several width and texture options |
| HardiePanel vertical siding | Board-and-batten look, accent walls, gable ends | Clean vertical lines, often paired with lap siding elsewhere on the house |
| HardieShingle siding | Accent areas, gables, cottage-style homes | Staggered or straight-edge shingle profile without the maintenance of real wood shakes |
| HardieTrim boards | Window and door casing, corners, fascia | Matches the siding's factory finish for a consistent, non-combustible trim package |
All of these come with James Hardie's factory-applied ColorPlus finish as an option, which is baked on in multiple coats under controlled conditions rather than brushed on after installation. For this region, Hardie's siding is engineered under its HZ5 configuration, built for climates with sustained moisture and freeze-thaw cycling rather than hot, dry conditions — a better match for Whatcom County winters than a product engineered for a different part of the country.
Matching the Product to the House
A one-story rambler with simple rooflines has different needs than a two-story home with multiple gables, dormers, and roof-to-wall transitions. More roofline complexity means more flashing points, which means more places for water to find a way in if the installation isn't careful. Part of the estimate walk-through is identifying those higher-risk transitions before we ever price the job, not discovering them mid-installation.
What a Correct Fiber Cement Installation Actually Involves
Fiber cement's long-term performance depends almost entirely on installation quality. The material itself resists rot, swelling, and combustion, but none of that matters if the details behind it are wrong. Here's what we treat as non-negotiable on every Custer job, not as an upgrade option.
Water Management Behind the Siding
A drainage plane or rain screen behind the siding gives any moisture that gets past the surface a way to drain and dry instead of sitting against the wall sheathing. In a climate where driving rain is a regular event rather than an occasional storm, this layer is what keeps a small amount of incidental moisture from turning into trapped moisture over time.
Fastening and Clearances
Fiber cement has to be fastened with the correct nail or screw type, spacing, and depth — over-driven or under-driven fasteners are one of the more common causes of cracking and premature failure. Manufacturer-specified clearances from grade, roofline, and deck surfaces keep splash-back and standing water away from the board edges, which matters more here than in a drier market.
Flashing at Every Penetration
Windows, doors, hose bibs, vents, and any other wall penetration need flashing that's lapped correctly to shed wind-driven rain rather than trap it. This is one of the most common places we find problems on tear-offs of other installers' work — not because the siding material failed, but because a penetration wasn't flashed to handle rain coming in sideways.
Joint Treatment and Caulking
Factory-cut edges hold the ColorPlus finish better than field cuts, so we use factory edges wherever the layout allows and seal field cuts to spec when they're unavoidable. Joints get the caulk type and technique James Hardie specifies, since the wrong caulk or a skipped joint is exactly the kind of detail that looks fine at installation and fails two winters later.
How Our Process Works
Assessment
We start by walking the property and looking at what's currently on the walls, how it's held up, and where the house's specific exposure — sun, shade, prevailing wind, roofline complexity — is likely to put the most stress on new siding. This is also when we flag anything that might need attention underneath, like sheathing that's taken on moisture damage over the years.
Prep and Tear-Off
Old siding comes off, and we inspect the sheathing and framing underneath before anything new goes up. Any rot or water damage gets addressed at this stage — covering it over with new siding just hides a problem that will resurface later. We install or verify the water-resistive barrier and drainage plane before the fiber cement goes on.
Installation
Siding, trim, and any accent panels go up to James Hardie's published installation specifications, with the fastening, clearance, and flashing details covered above treated as standard practice on every job, not something reserved for a premium tier.
Final Walkthrough
We walk the finished exterior with the homeowner, check caulking and trim details up close, and go over basic care for the new siding before we consider the job done.
What Affects the Cost of a Fiber Cement Siding Project
Every Custer property is different, so exact pricing comes from an on-site estimate, but these are the main factors that move the number up or down.
| Factor | Why It Matters |
|---|---|
| Square footage and wall complexity | More corners, gables, and roof transitions mean more cutting, flashing, and labor time |
| Condition of existing sheathing | Rot or water damage found during tear-off adds repair work before new siding can go on |
| Product line and profile chosen | Lap siding, panel siding, and shingle profiles carry different material and labor costs |
| Trim and accent work | Matching HardieTrim on windows, corners, and fascia adds material and detail time |
| Site access | Tight lots, landscaping, or multi-story walls can add scaffolding or staging time |
Why a Crew That Already Works in Custer Matters
A crew that regularly installs siding in and around Custer already knows how this area's combination of salt air, wind-driven rain, and a long moss season behaves on a wall assembly over time, because they've seen it firsthand on other jobs nearby. That shows up in small decisions during installation — how tight to run a flashing lap, where to add extra drainage detailing on a shaded north wall, which fastener grade to use given the local air quality. Those choices are exactly what separates a fiber cement installation that lasts several decades from one that starts showing problems within a few wet seasons, and they're hard to get right on the first attempt without local experience behind them.
Caring for Fiber Cement Siding After Installation
Fiber cement is genuinely low-maintenance compared to wood or engineered wood siding, but "low-maintenance" isn't "no-maintenance," especially in a climate that stays damp most of the year. A little routine attention keeps the ColorPlus finish and the caulked joints performing the way they're designed to.
- Rinse the siding with a garden hose once or twice a year to clear salt residue, pollen, and general grime before it builds up
- Check caulked joints around windows, doors, and trim annually and have any cracked or shrinking caulk redone
- Keep an eye on shaded, north-facing walls for early moss or mildew growth and clean it off before it spreads
- Trim back landscaping that keeps a wall damp or blocks airflow and sun exposure
- Watch for any spots where paint or finish looks dull or chalky compared to the rest of the wall, which can signal a finish issue worth a closer look
Get a Free, No-Pressure Estimate
If you're considering fiber cement siding for a Custer home, we're glad to come take a look, walk you through what your specific property needs, and give you a straight answer on scope and cost. Reach out using the form below to schedule a free, no-pressure estimate.